A properly maintained septic system is essential for any home or property that relies on private wastewater treatment. Among the various services a septic system requires, septic tank cleaning stands out as one of the most crucial. Over time, waste materials accumulate inside the tank, creating layers of sludge and scum that can interfere with proper system function. Without regular cleaning, these layers build up enough to cause backups, foul odors, drainage issues, and costly damage to the drain field. Septic Tank Cleaning Brighton MI is not just a recommended maintenance task—it is an essential part of protecting your property, preserving your system’s lifespan, and ensuring the safe and effective treatment of household wastewater. For homeowners who want their septic system to operate efficiently for many years, investing in professional cleaning services is a necessary step.
The septic tank works by separating wastewater into layers. Solid waste settles at the bottom as sludge, while lighter materials like oils and grease float to the top as scum. In the middle lies relatively clear liquid waste, which flows out to the drain field for filtration. As sludge and scum accumulate, the tank’s ability to separate and process wastewater diminishes. If the tank is not cleaned regularly, waste can overflow into the drain field, causing clogs, contamination, and system failure. Because the septic system depends on a delicate balance between natural bacterial activity and mechanical flow, failing to maintain it can lead to serious complications. Septic tank cleaning restores this balance by removing waste buildup and allowing the system to operate as intended.
Over time, even the most carefully used septic system will accumulate solids from everyday household activities. Each flush, shower, and load of laundry contributes to the amount of waste entering the tank. As sludge levels rise, the tank has less room to hold and treat wastewater, increasing the likelihood of backups. Homeowners often discover that their system is overdue for cleaning when they notice slow drains, gurgling pipes, or unpleasant odors near the tank area. These signs indicate that the system is under strain and requires immediate attention. Regular septic tank cleaning prevents these issues before they occur, helping homeowners avoid emergencies, property damage, and costly repairs.
Routine cleaning also helps protect the drain field, which is one of the most expensive components of a septic system. Because the drain field handles the final stage of wastewater treatment, it must remain unobstructed and capable of absorbing liquid effluent. When sludge or scum leaves the tank and enters the drain field, it can clog the soil pores and distribution pipes. Once the drain field becomes saturated or blocked, it may require extensive repairs or full replacement. Septic tank cleaning removes the waste that could otherwise damage the drain field, preserving its efficiency and extending its lifespan. This preventative service is significantly more affordable than repairing a damaged drain field, making cleaning an essential part of cost-effective septic maintenance.
Understanding the importance of regular cleaning is helpful, but many homeowners still question how often this service should occur. The answer depends on several factors, including household size, water usage habits, and tank capacity. Generally, septic tanks should be cleaned every few years, but households with larger families or heavy water usage may require more frequent service. Professionals use a combination of inspection tools and experience to assess sludge levels and determine an appropriate cleaning schedule. When homeowners stay consistent with these recommended intervals, they reduce the risk of unexpected problems and ensure their systems continue functioning smoothly.
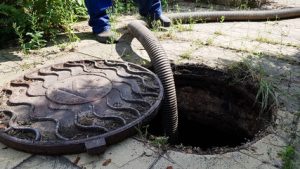
Here are two key components included in most professional septic tank cleaning services:
- Sludge and Scum Removal
- Specialists use high-powered vacuum equipment to thoroughly remove accumulated solids, ensuring the tank is cleared of all sludge and scum layers.
- Internal Tank Rinsing
- After the solids are removed, the interior of the tank is rinsed to clear stubborn residue clinging to the walls, baffles, and compartments, restoring maximum capacity and efficiency.
Professional septic tank cleaning involves more than simply pumping out the tank. Skilled technicians use specialized equipment to remove waste safely and efficiently. High-capacity vacuum trucks extract sludge and scum, while water jets may be used to loosen stubborn buildup. During the cleaning process, technicians also inspect the interior of the tank for structural issues such as cracks, corrosion, or damaged baffles. These components play an important role in controlling the flow of waste within the tank. Identifying problems early allows homeowners to schedule repairs before the issues escalate. A thorough cleaning service combines waste removal with system evaluation, ensuring that both the tank and associated components remain in good condition.
The cleaning process also supports a healthy bacterial balance within the tank. Septic systems rely on naturally occurring bacteria to break down organic matter. When sludge levels get too high, bacteria cannot work efficiently because the tank becomes overloaded. Cleaning restores an environment where bacteria can perform optimally, promoting more effective waste decomposition. Some septic specialists may recommend bacterial additives to help maintain a healthy microbial environment, though these products work best when used in conjunction with regular cleaning rather than as replacements for it.
Another benefit of professional septic tank cleaning is improved household efficiency. A clean tank allows wastewater to flow freely, reducing the chances of slow drains, gurgling pipes, and unpleasant odors. These issues can disrupt everyday routines and create frustration for homeowners. By maintaining a clean septic system, households experience smoother operation of sinks, toilets, and laundry appliances. This translates into greater comfort, cleanliness, and peace of mind. Knowing that the system is functioning properly allows homeowners to focus on their daily tasks without fear of unexpected disruptions.
In addition to improving performance, regular cleaning supports the longevity of the entire septic system. Like any mechanical structure, septic systems require care to avoid premature failure. Tanks that are neglected are more likely to develop structural damage, leaks, or blockages. Over time, these issues can lead to significant repair costs. Septic tank cleaning helps reduce wear and tear by removing waste that could otherwise put pressure on the system. Clean tanks place less strain on pipes, filters, and the drain field, allowing the entire system to operate more efficiently and last longer.
To deepen the homeowner’s understanding of the service, here are two additional septic tank cleaning benefits:
- Early Detection of Problems
- Cleaning provides an opportunity for professionals to inspect the tank and identify cracks, leaks, or damaged components before they turn into costly repairs.
- Odor Prevention and Hygiene
- Removing built-up waste eliminates foul odors and reduces the risk of sewage exposure, contributing to a cleaner and safer home environment.
Homeowners who stay on top of septic cleaning also enjoy environmental benefits. A neglected tank can overflow, contaminating soil and groundwater with harmful bacteria and chemicals. This can pose risks to nearby plants, animals, and water sources. Regular cleaning prevents overflow events and ensures wastewater is properly processed before entering the environment. By keeping septic systems functioning properly, homeowners help protect natural ecosystems and preserve local water quality.
For properties that rely heavily on their septic systems, seasonal considerations may also influence cleaning schedules. During rainy seasons, for example, drain fields may become saturated, making it even more important that tanks operate at peak efficiency. Routine cleaning helps ensure that the system can adapt to changing weather conditions without becoming overwhelmed. Seasonal inspections paired with cleaning services provide homeowners with year-round reliability, regardless of environmental fluctuations.
Modern septic tank cleaning services often include advanced diagnostic tools that give homeowners a clearer understanding of their system’s condition. Video inspection cameras allow technicians to examine internal pipes and components without excavation. These technologies make it easier to detect clogs, cracks, or structural weaknesses. Having access to detailed system information empowers homeowners to make informed decisions about maintenance and repairs. It also adds an extra layer of assurance that their septic system is operating safely and efficiently.
Another important element of septic tank cleaning is educating homeowners about proper system use. Professionals often provide recommendations on what should and should not enter the tank, as certain materials can worsen sludge buildup or interfere with bacterial activity. For example, non-biodegradable items, excessive grease, and harsh chemicals can destabilize the system and increase the frequency of cleanings. Understanding proper septic system care helps homeowners reduce unnecessary strain on their tanks and prolong their system’s lifespan. With a combination of professional cleaning and responsible usage habits, homeowners can enjoy a reliable septic system for many years.
Emergencies can also arise when septic tanks are not cleaned regularly. Backups, sewage leaks, and foul odors are all warning signs that immediate action is needed. Septic tank cleaning providers often offer emergency services to address these issues quickly. Rapid intervention can prevent further damage and restore functionality to the system. Homeowners who rely on emergency services often find that a lack of routine cleaning played a significant role in the problem. This further highlights the importance of staying proactive with septic maintenance.
Ultimately, septic tank cleaning serves as the foundation for a healthy, efficient, and long-lasting septic system. It is one of the most cost-effective ways to prevent major issues and maintain the smooth operation of household plumbing. By removing accumulated waste, restoring interior tank space, improving bacterial balance, and protecting the drain field, cleaning helps keep the entire system functioning optimally. It also provides homeowners with greater peace of mind, knowing that their wastewater is being treated safely and responsibly.
For homeowners who want to protect their investment, maintain hygiene, and ensure the long-term reliability of their wastewater system, septic tank cleaning is not just a maintenance option—it is a necessity. Scheduling regular service, understanding proper system care, and partnering with trained professionals can keep septic systems performing at their best for decades. With consistent attention and high-quality cleaning services, homeowners can enjoy reliable wastewater management, reduced repair costs, and a healthier home environment.
When maintained properly through routine septic tank cleaning, a septic system becomes one of the most dependable features of a property. By staying proactive and prioritizing professional cleaning services, homeowners ensure that their systems continue functioning smoothly, efficiently, and safely for the long term.